Black Friday Exclusive: $2 for 2 Months + 50% Off Any Plan
Black Friday: 50% Off
Changing Website and Test Flow URLs
In CheckView, website URLs and test flow URLs can be updated at any time to accommodate changes in your site’s domain, structure, or testing requirements. However, updating URLs will impact all associated test flows, and additional steps may be required to ensure your tests continue to function correctly.
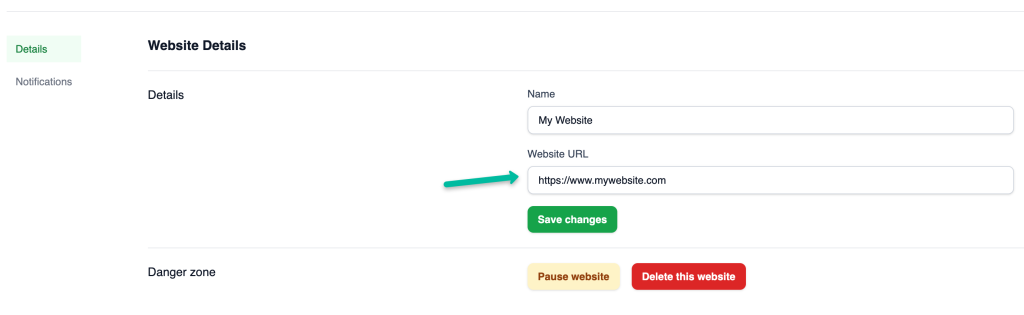
Changing the Website URL
- Go to the Websites section in your dashboard.
- Select the website you want to update.
- Click the Settings button.
- Update the Website URL field to the new URL.
- Save your changes.
- If the website is already on the new URL and has the CheckView plugin activated, CheckView will connect and any existing test flows using the {{TEST_FLOW_PAGE_URL}} variable will utilize the new URL automatically.
If the new website URL does not have the CheckView Helper plugin installed or active, CheckView will display a connection error. To resolve this:
- Install and activate the CheckView Helper plugin on the new website URL. This may mean you need to move the site from the previous domain to the new domain before CheckView can connect if this is for the same website.
- Reconnect the website to CheckView following the connection setup instructions as needed.
- Ensure the plugin is active and functioning properly to avoid connection issues.
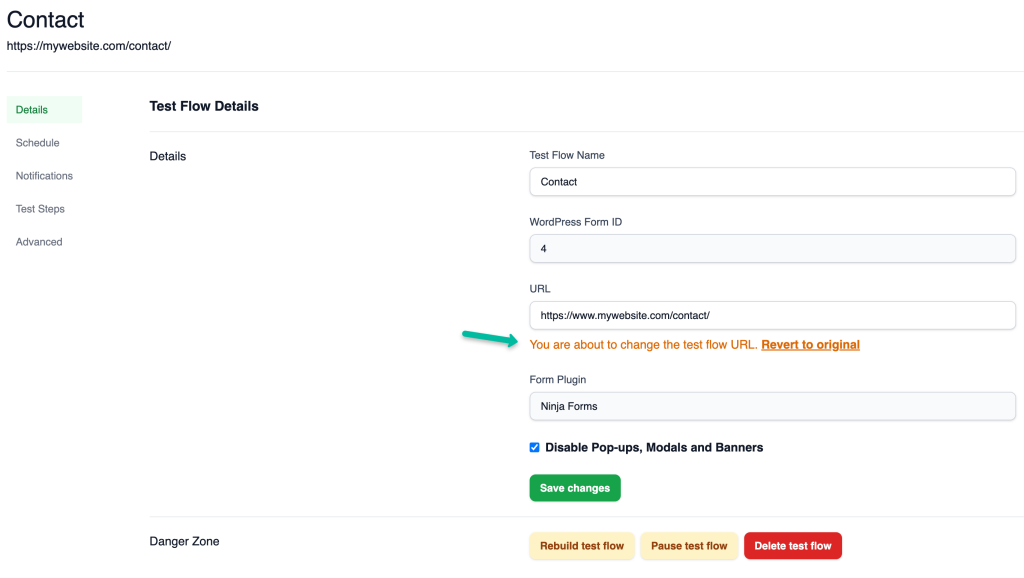
Changing the Test Flow URL
- Go to the test flow you wish to edit.
- Click the Settings button.
- Update the Website URL field to the new URL.
- Save your changes.
Recommendations After Changing URLs
- Auto-Generated Flows: If your test flow was automatically generated, your previous tests should function after updating the website URL in CheckView’s Website Settings. This is because the test steps leverage the {{TEST_FLOW_PAGE_URL}} variable, which dynamically references the updated URL from the Website Settings
- Custom Test Flows. If the test flow includes custom steps or was built entirely custom, it is recommended to review the steps manually to ensure there are no hardcoded URLs that need to be updated. Any steps using the {{TEST_FLOW_PAGE_URL}} should have updated automatically though.