WP Legends Live Panel on March 11th: The Line Between Good and Great Agencies
WP Legends Live Panel on March 11th:
Creating a Custom Test Flow
Custom test flows in CheckView allow you to design and execute fully tailored test sequences for unique workflows that cannot be auto-generated. Unlike automatically generated test flows, custom test flows are ideal for testing specific scenarios, plugins, or workflows that fall outside the scope of CheckView’s default supported plugins (e.g., WooCommerce, Contact Form 7, Gravity Forms, etc). Custom test flows provide the flexibility to:
- Test non-standard workflows like membership sites, learning management systems, or social networks.
- Include unique steps for custom functionality, dynamic elements, or complex user interactions.
- Combine multiple workflows or plugins into a single test flow.
AI vs Manual Test Flow Creation
When creating a custom test flow, you’ll first choose between two approaches:
- Generate with AI (Beta) – Enter a URL and CheckView will visit the page, analyze the form, and automatically generate test steps. Supports conditional fields and wizard forms via multi-pass analysis.
- Setup Steps Manually – Build your test steps by hand using the step editor.
AI generation includes automatic datepicker detection across all major WordPress form plugins and handles multi-page forms.
Custom Test Flows Use Cases
Consider creating a custom test flow in the following scenarios:
- Testing Unsupported Plugins: For example, if you’re using a custom booking system or an unsupported form plugin like Elementor, Happy Forms, etc.
- Complex Multi-Step Workflows: Such as testing a combination of user login, membership access, and checkout within the same flow.
- Dynamic and Interactive Features: Testing elements like AJAX-powered forms, dropdown menus, or modals that require specific interactions.
- Highly Customized Sites: If your site includes heavily customized elements that do not align with auto-generated test flows.
Creating a Custom Test Flow
- Log in to your CheckView dashboard.
- Click on the website where the test flow should be created.
- Click on “Add Test Flow” from the website dashboard.
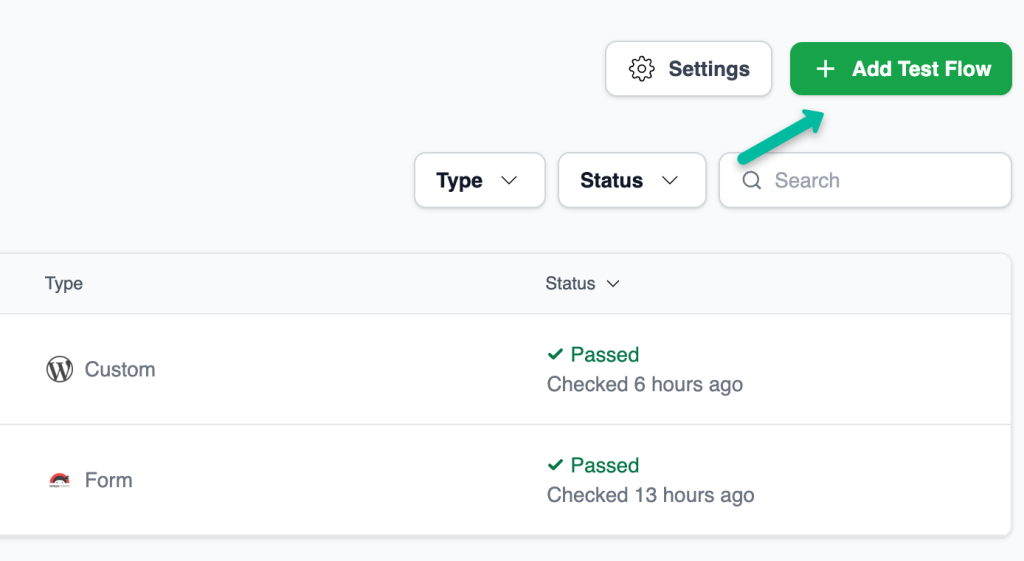
4. Disregard any detected plugins and instead click on Custom Flow
5. Enter a descriptive name for the test flow (e.g., “Custom LMS Registration Test”)
6. By default, CheckView will automatically close or accept any detected popups, cookie banners, or modals during test execution. You can uncheck this option if you prefer to manage these elements manually. Additionally, you can use the Selector to Trigger Popup Close (Optional) field to specify a CSS class or ID for any specific popup or modal you’d like CheckView to automatically close whenever it appears at any point in the test.
7. Configure the frequency of test runs.
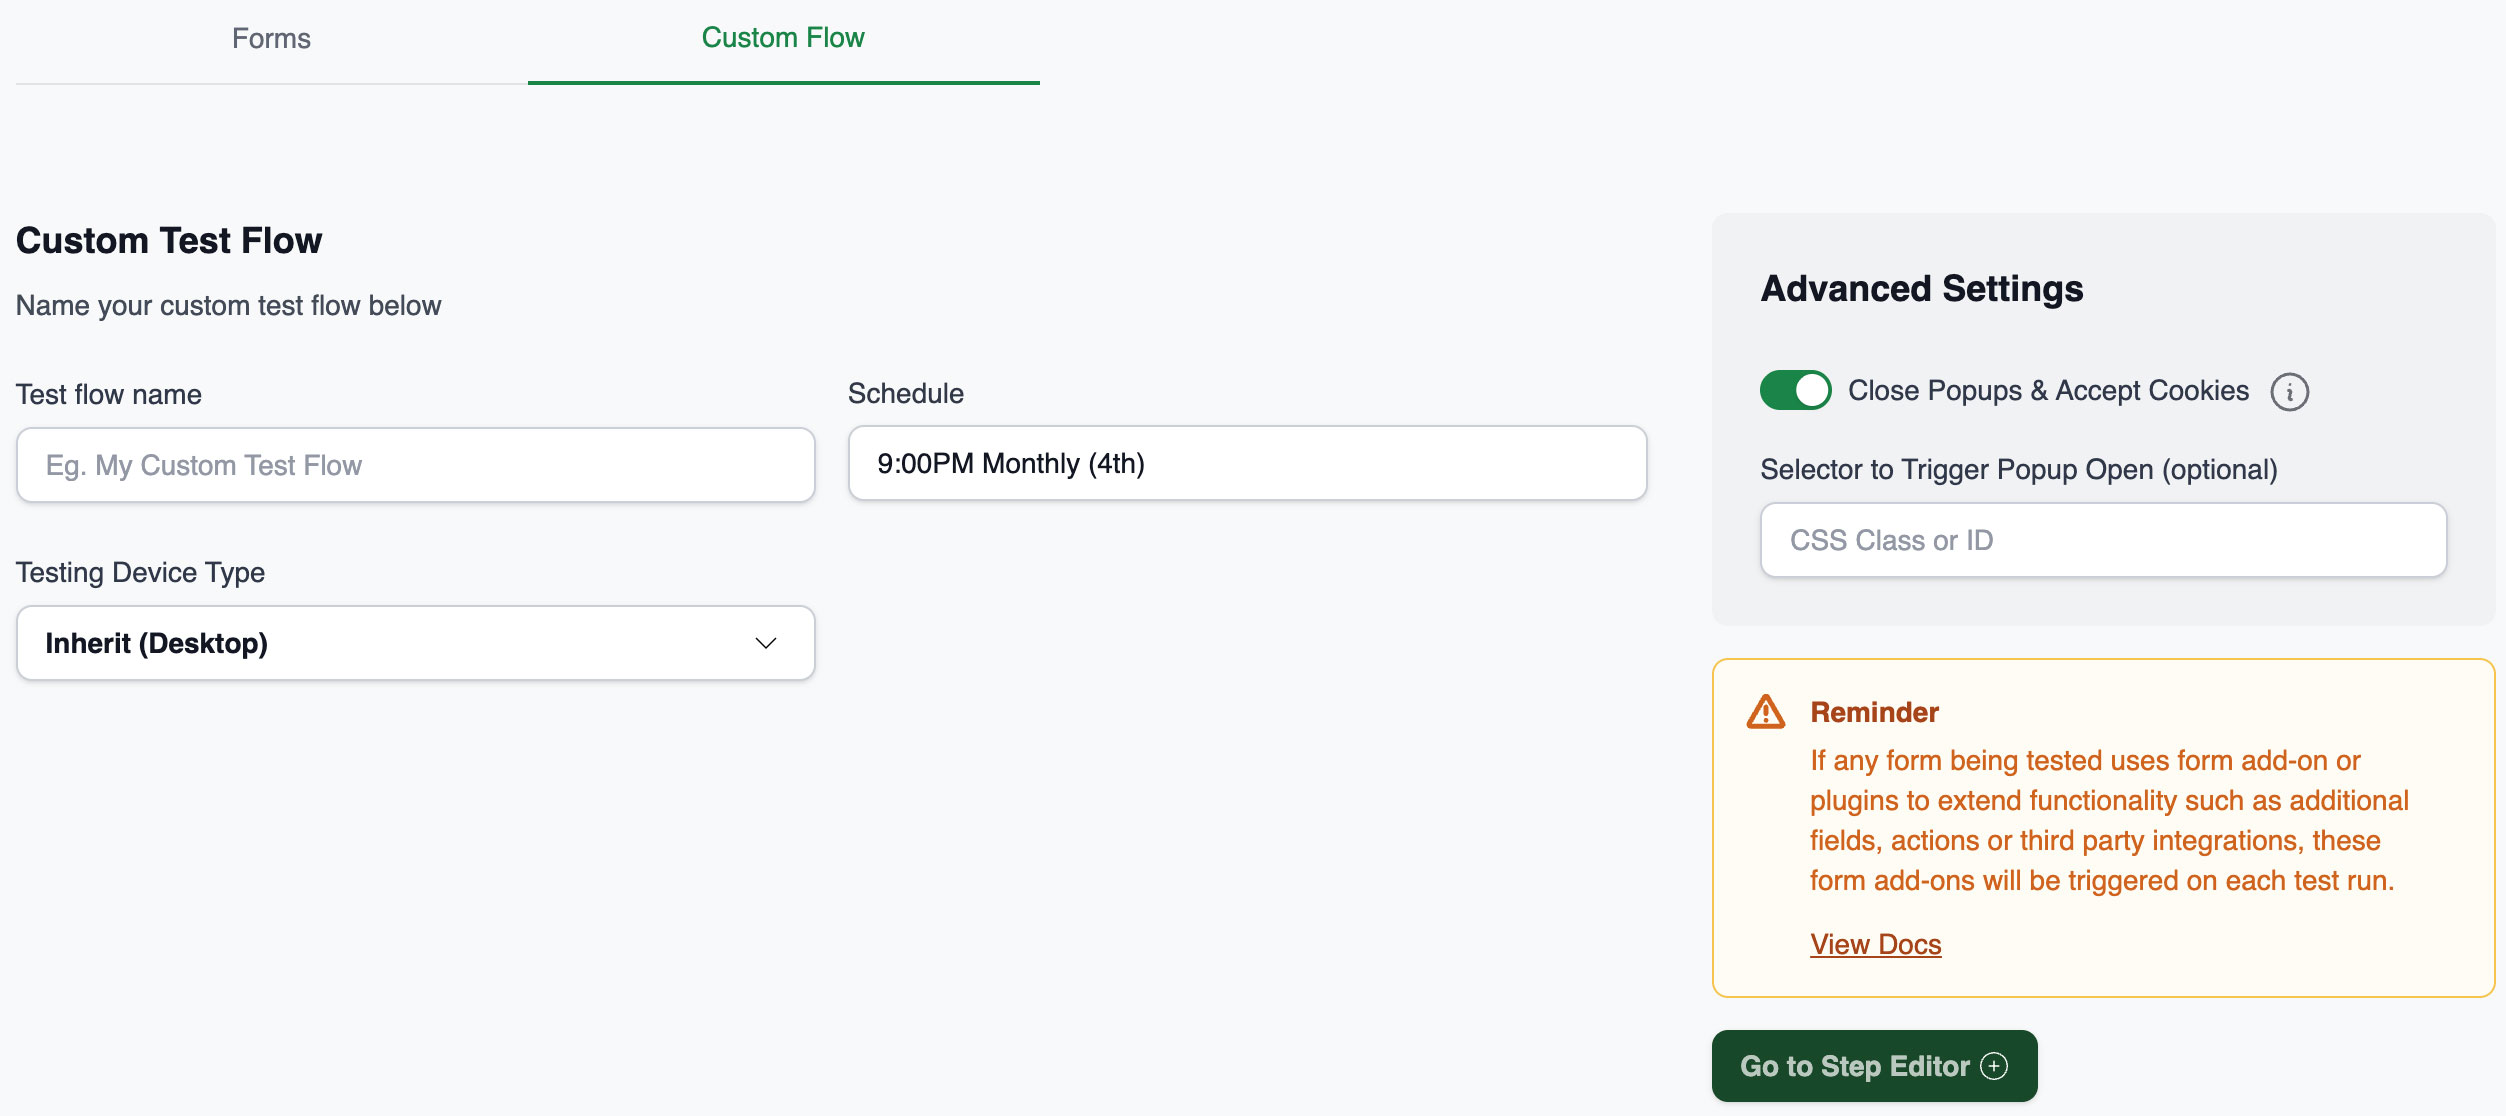
8. Click go to step editor.
9. Click Add Step and select the type of action (e.g., Go to URL, Click, Assign, etc.) and configure the step settings, such as the URL, element selectors, or input values. Review our doc on Understanding the Step Editor for more information.
10. Add as many steps as needed to complete your custom workflow and use a logical sequence to mimic the actual user journey on your website.
11. Once all steps are configured, click save changes.
12. Return to the Test Flow screen. As custom test flows are not automatically tested with a preview, it is strongly recommended to click Run Test to verify that your test flow is functioning as expected. Please note that executing this test will count toward your monthly test allocation.
13. After the test has ran, review the video and steps for any errors. If any issues arise, click Edit steps from the test flow dashboard and adjust accordingly until the test passes. It will then run on its scheduled test configuration.
Important Note: The most common reason custom test flows fail is due to incorrectly configured selectors or their associated values. Carefully review the test video to identify where the bot might be encountering issues or getting stuck. For further guidance, refer to our documentation on Understanding Test Failures.
Form in Popup or Modal
When the Form in popup or modal checkbox is enabled, the Close Popups & Accept Cookies setting is automatically disabled to prevent interfering with modal display. This ensures that CheckView does not accidentally dismiss the popup containing the form you are testing.
Rebuilding a Test Flow
To rebuild an AI-generated test flow, click Rebuild test flow. AI-generated flows will use AI again during rebuild; manually created flows use standard generation.
Tips for Creating Effective Custom Test Flows
- Plan Your Workflow: Outline the exact sequence of actions a user would take for the workflow you’re testing.
- Use Specific Selectors: When targeting elements, use precise CSS or XPath selectors to minimize errors caused by DOM changes.
- Incorporate Validation Steps: Add steps like Assert element is visible or Assert element text equals to ensure expected outcomes.
- Test Interactions with Dynamic Elements: Include actions like Hover, Click, or Assign for elements that depend on user interaction.
- Combine with Notifications: Configure notifications for custom test flows to alert you of failures in critical workflows.