Black Friday Exclusive: $2 for 2 Months + 50% Off Any Plan
Black Friday: 50% Off
Creating a WooCommerce Test Flow
CheckView makes it easy to automate checkout testing for your WooCommerce store, helping you ensure your add-to-cart and checkout processes work reliably with every update. Follow the steps below to create and schedule your WooCommerce test flow.
1. Add a New Test Flow
From your CheckView website dashboard, click Add Test Flow.
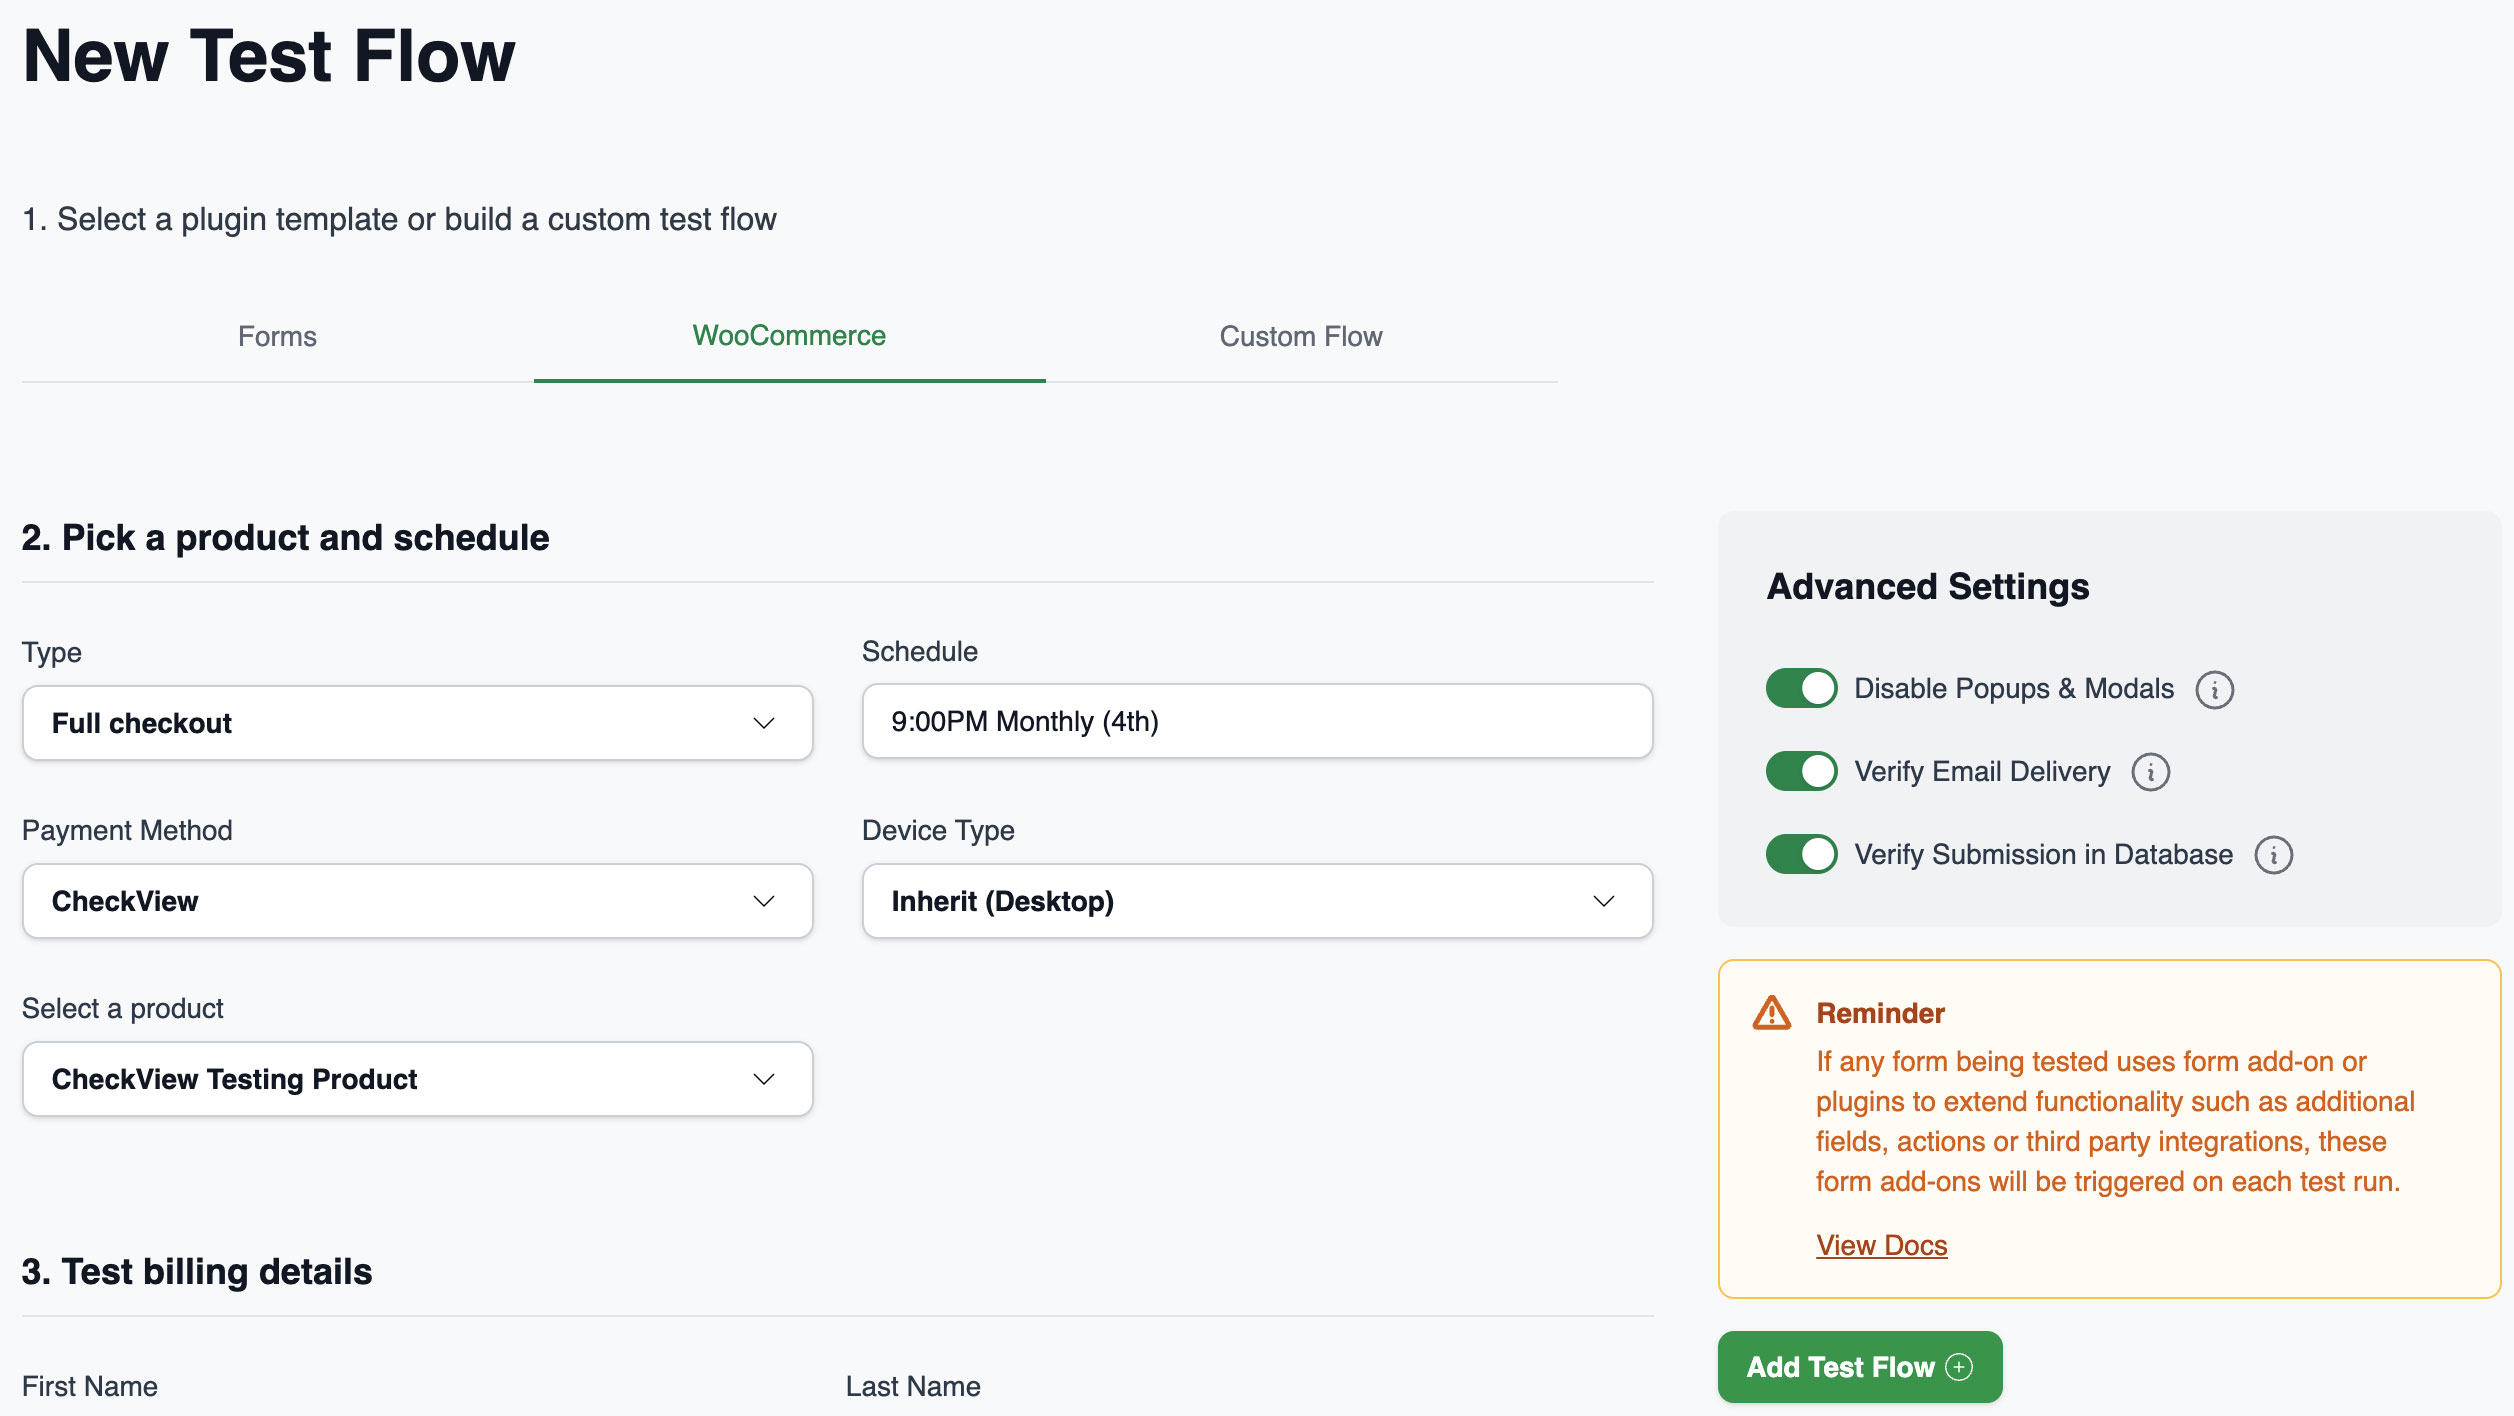
When you create a new test flow, CheckView automatically detects whether WooCommerce is active on your connected WordPress site. If it is, select WooCommerce from the list of available options.
2. Choose a Product
CheckView automatically retrieves the last 1,000 products updated in your WooCommerce store. From the dropdown, select the product you want to include in the test flow.
You can choose between a real product from your store or the CheckView Testing Product, a hidden test product automatically created by CheckView. This product is invisible to normal users and excluded from search engines.
Notes:
- Only one product can be selected per test flow.
- CheckView supports simple and variable products (e.g., size, color).
- Configurable or custom product types, add-ons, or nonstandard setups may not be supported but can still be tested by manually editing the steps after setup.
3. Select a Test Flow Type
CheckView offers two built-in WooCommerce test flow types:
- Add to Cart – The bot visits the product page, adds the item to the cart, and verifies that the cart functions correctly.
- Full Checkout – Includes the Add to Cart process but continues through checkout, entering billing and shipping details, and submitting a test order using a test payment method.
Choose the option that best fits your testing goals and current site setup.
4. Choose a Supported Payment Gateway
Select which payment gateway the test should use:
- CheckView Payment Method – A hidden test gateway added by CheckView that only works for CheckView bots. It does not connect to any real or sandbox processor.
- Stripe (Test Mode) – If your site uses Stripe, CheckView can run the test in Stripe’s test mode. It temporarily enables test mode only for CheckView bots and completes a simulated transaction.
- Payment Plugins for Stripe WooCommerce (Test Mode) – For stores using the Payment Plugins for Stripe WooCommerce plugin. Uses Stripe test keys to simulate payment without processing actual charges.
Important:
- No live payments are ever processed.
- Other payment gateways in sandbox or test mode are not yet supported but are planned for future releases.
5. Set the Test Schedule
Choose how often you want the test to run and set the preferred time and timezone.
Keep in mind that running tests more frequently will use more of your available monthly test credits.
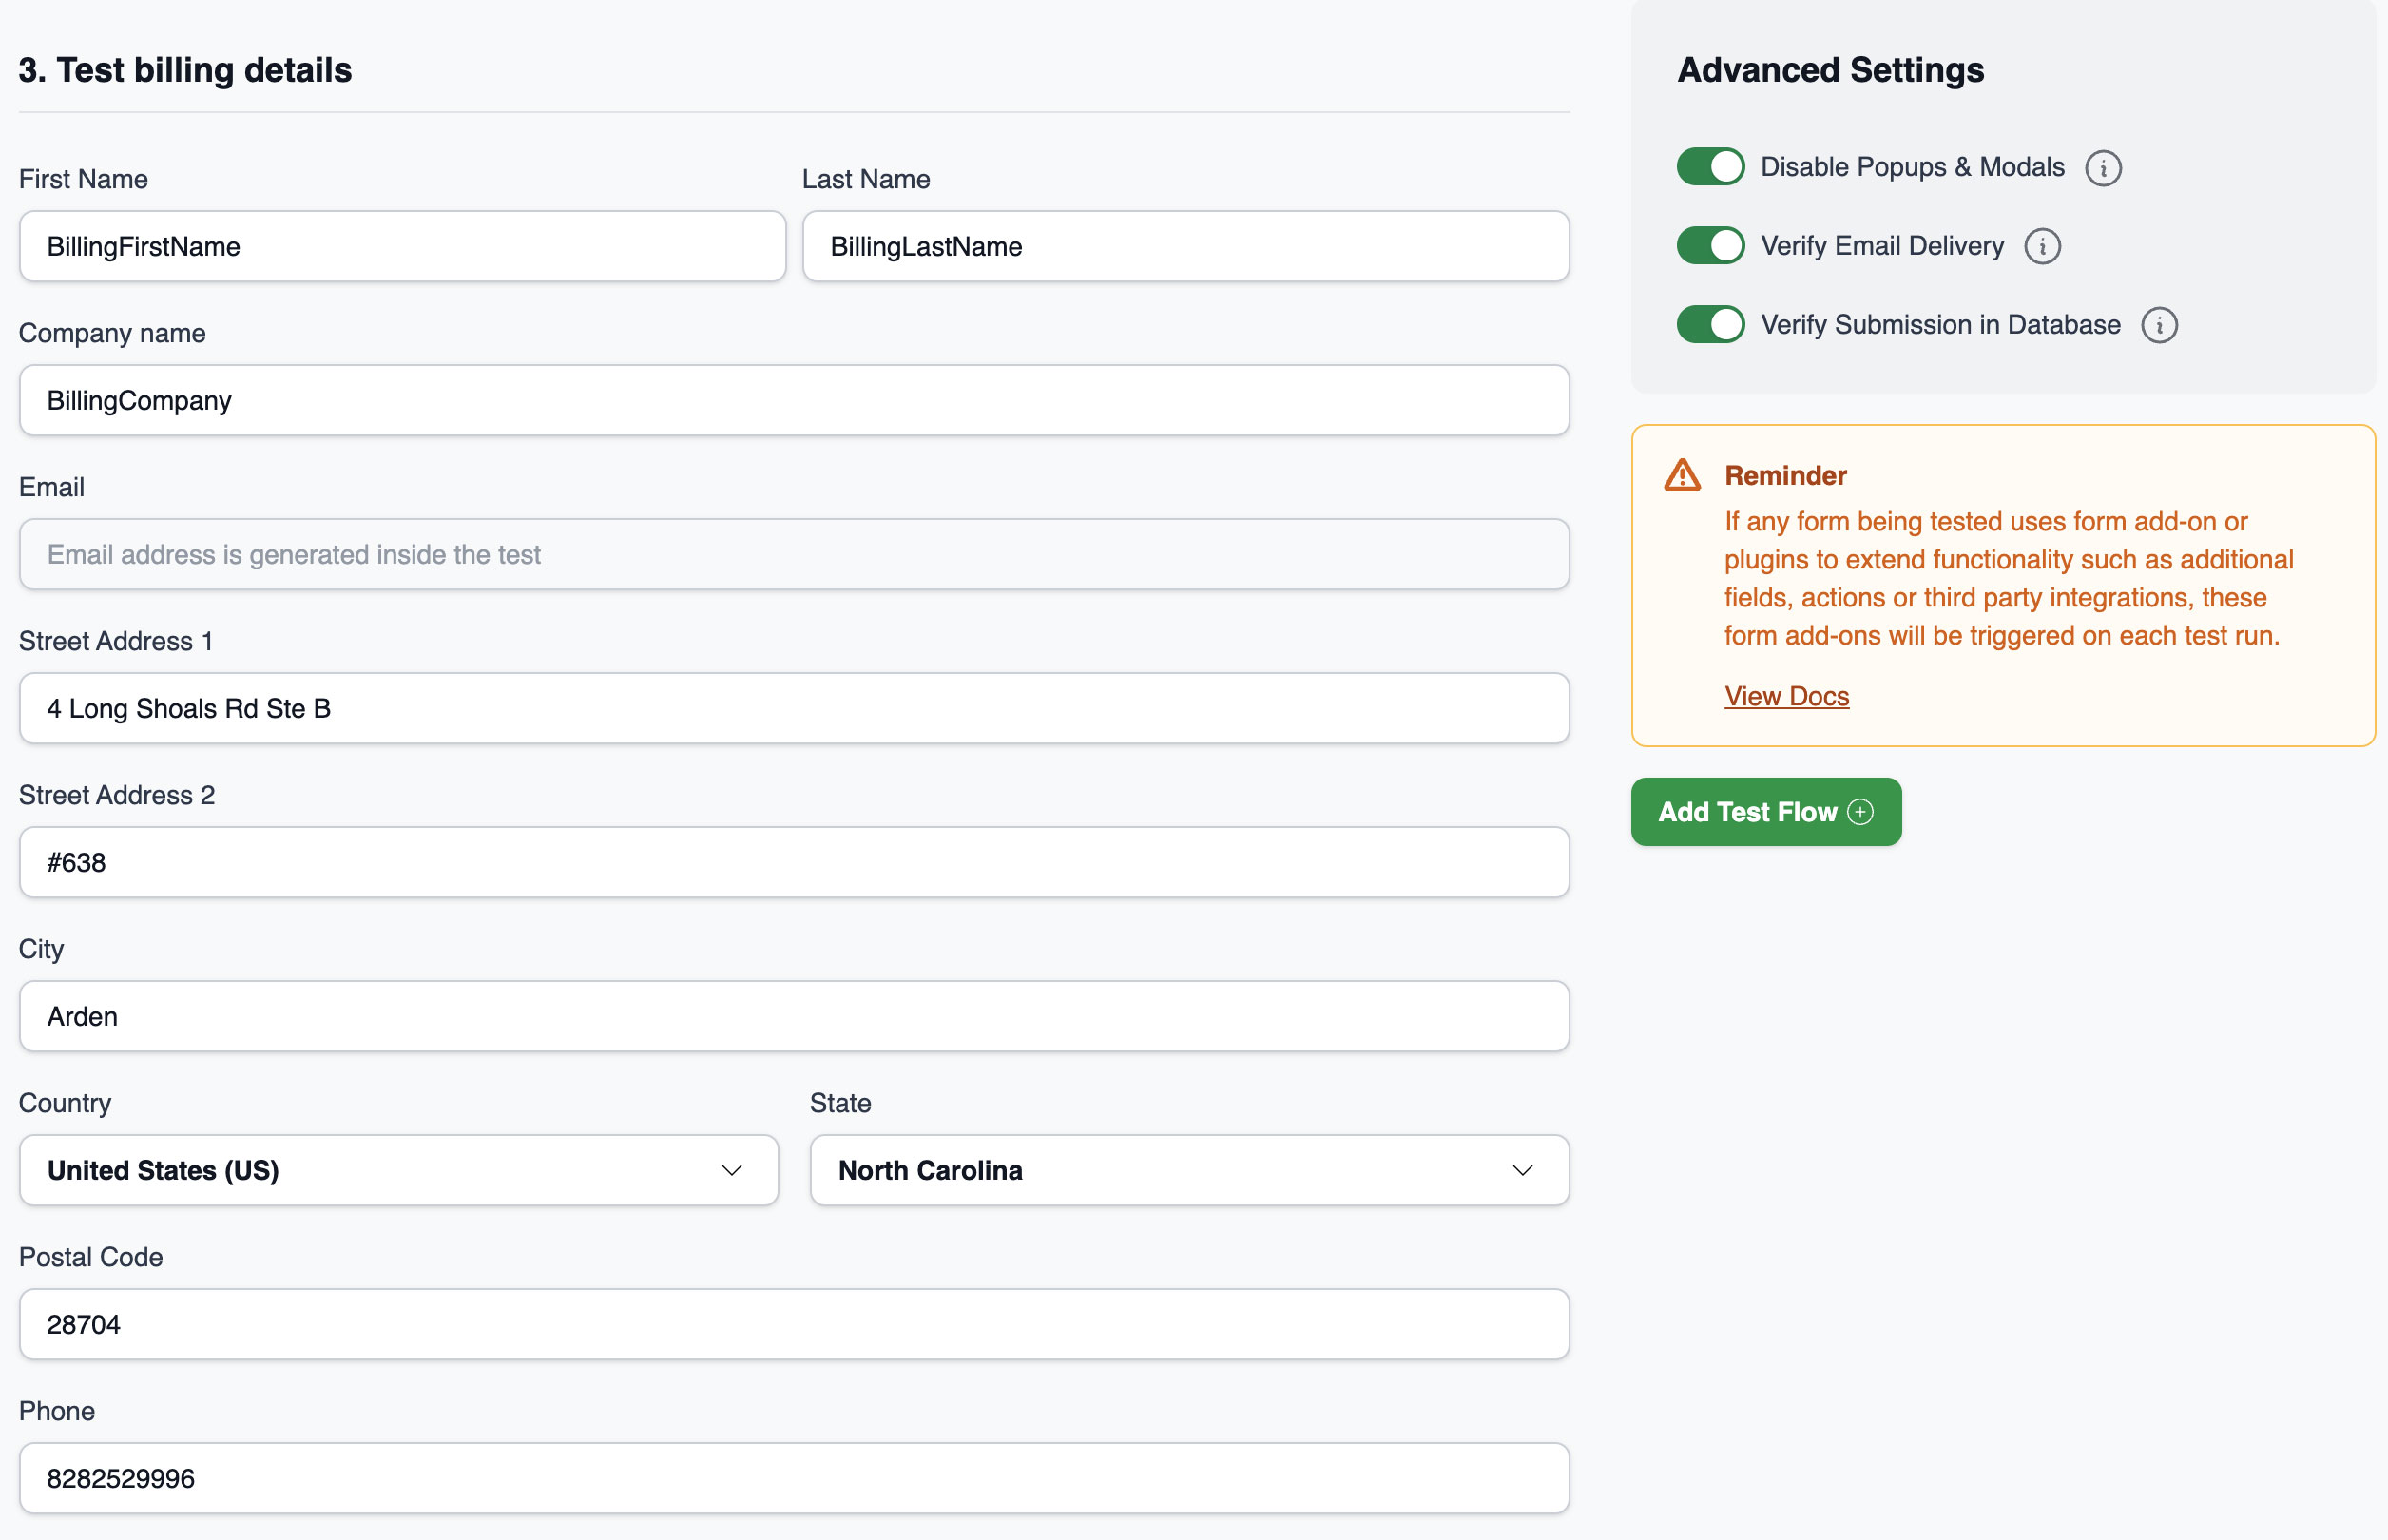
6. Enter Billing Details
CheckView automatically fills in sample billing information:
- On Essentials and Plus plans, default CheckView test data is used.
- On Advanced plans, organization-level variables you’ve configured will apply.
You can adjust billing details for this test flow, but note:
- The email address field cannot be changed (used internally by CheckView for test management).
- Test gateways do not validate billing data.
- Using a country not available for sales in your WooCommerce settings will cause the test to fail.
7. Add Separate Shipping Details (Optional)
If you’d like to use different shipping information, CheckView will auto-fill test data similar to the billing details.
- Ensure the country you select allows shipping and has available shipping methods.
- If you use an address validation plugin, input a valid address to prevent the test from failing.
8. Add Order Notes (Optional)
You can include test order notes, which are filled automatically using CheckView defaults or your organization variables (for Advanced plans).
9. Create the Test Flow
Click Add Test Flow to begin setup. A popup will appear while CheckView initializes your test, which may take several minutes.
During initialization:
- All necessary test steps are created automatically.
- The test flow status will display as Initializing until setup is complete.
- Editing or running the test flow is temporarily disabled.
Once initialization finishes, CheckView automatically performs a preview test run.
10. Review and Monitor
If the test initializes and runs successfully, its status will show Passed.
If it fails, you’ll receive a detailed error message and video recording to help you troubleshoot.
Your test will now run automatically on the schedule you selected. If you encounter any issues or errors, refer to our troubleshooting guide for solutions.
11. Final Step: Exclude CheckView from Analytics
To avoid inaccurate conversion tracking, make sure to exclude CheckView’s IP addresses from your analytics or order tracking tools.
Congratulations!
You’ve successfully set up your first WooCommerce automated test flow in CheckView. Your checkout and add-to-cart processes will now be monitored continuously, helping you catch issues before your customers do.