Black Friday Exclusive: $2 for 2 Months + 50% Off Any Plan
Black Friday: 50% Off
Understanding the Step Editor
With CheckView’s visual test editor, you have complete control over your test steps, including adding, reordering, and deleting steps. Access the editor by clicking the “Edit Steps” button on the individual test flow page or its test flow settings page.
Creating and Editing Tests
You can create tests using CheckView’s prebuilt test flows and refine them in the editor, or build them entirely from scratch using a custom test flow.
In the test editor, each step appears as a block with controls to add, remove, clone, or move steps. You can reorder steps easily using drag-and-drop or the up/down arrows, and remove steps quickly with the trash can icon.
Steps can also be marked as optional (see below), and you can include internal notes for documentation or collaboration purposes (see below).

Test Editor Interface
Each test step includes a dropdown menu to select the action type, such as going to a URL, making an assertion, or assigning a value. When interacting with page elements, specify the target using CSS or XPath selectors. Some actions require extra input fields. For instance, the “Assign” action needs a value to assign, and the “Keypress” action allows you to specify keys like “Enter” or “Backspace.” You can read more about all available actions in the Understanding Step Actions doc.
Variables
Variables in the Step Editor are dynamic placeholders that instruct CheckView what data to use when filling out fields during a test. These variables allow you to standardize inputs across your test flows without manually entering values for every field. For example, a {{FirstName}} variable might automatically populate a first name field with “TestFirstName,” ensuring consistent and predictable test data. Variables can streamline testing by reducing manual adjustments and enabling more flexible, reusable test flows. You can read more about all available actions in the Variables doc.
Assertions
Assertions are a type of action that validate conditions on the page, ensuring your test outcomes are as expected. Common assertions include checking element presence, visibility, and text content. Assertions can wait for conditions to be met within a specified timeout, improving test reliability. You can read more about all available actions in the Understanding Step Actions doc.
Selectors
Selectors are instructions that help the CheckView bot locate and interact with specific elements on a webpage, such as buttons or input fields. Defined using CSS or XPath, selectors map to elements in the website’s structure (DOM) and ensure each test step targets the correct element. Accurate and stable selectors are essential, as changes to the website’s code can break them. Tools like browser developer tools or SelectorHub can help identify reliable selectors quickly. For added reliability, CheckView supports fallback selectors to handle dynamic changes. You can read more about all available actions in the Mastering Selectors in CheckView.
Optional Steps
When a step is marked as optional, CheckView will attempt to run the step as usual, but if it fails, it will not cause the test to fail. Instead, CheckView will simply highlight the step in yellow in the results and continue with the remaining steps.

This is useful when dealing with:
- Elements that may not always appear (e.g., popups, upsell banners, seasonal messages)
- Conditional UI behavior
- Non-blocking visual elements (e.g., welcome messages, cookie banners already accepted)
How to Mark a Step as Optional
- Open the Step Editor: Navigate to the step you want to configure in your test suite.
- Locate the “Optional Step” Toggle: In the step’s settings panel, you’ll see a checkbox or toggle labeled Optional.
- Enable the Toggle: Check the box to mark the step as optional.
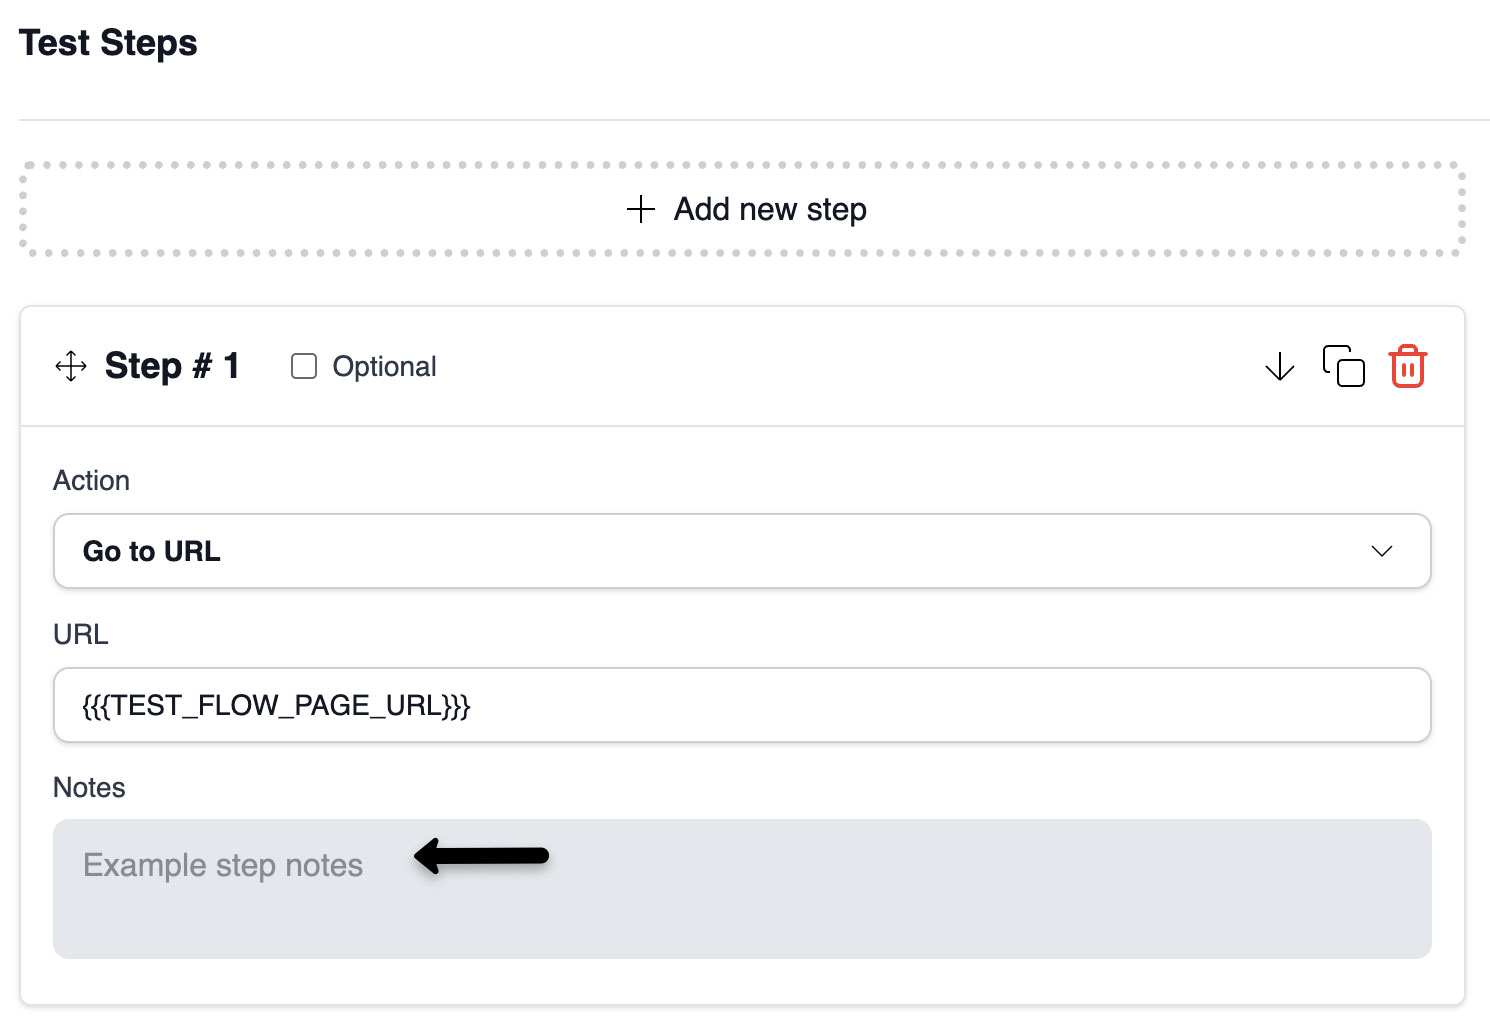
Step Notes
Step Notes allow you to add internal comments or reminders directly within the Test Step Editor. These notes are visible only to users inside your organization and do not appear in test results or reports.
Use Step Notes to:
- Explain the purpose of a specific step or why it was added
- Record troubleshooting details or context for future edits
- Provide quick guidance for teammates reviewing the test
Each step can have its own note, which can be added, edited, or deleted at any time. Step Notes are ideal for keeping complex or collaborative test flows organized and easy to maintain.
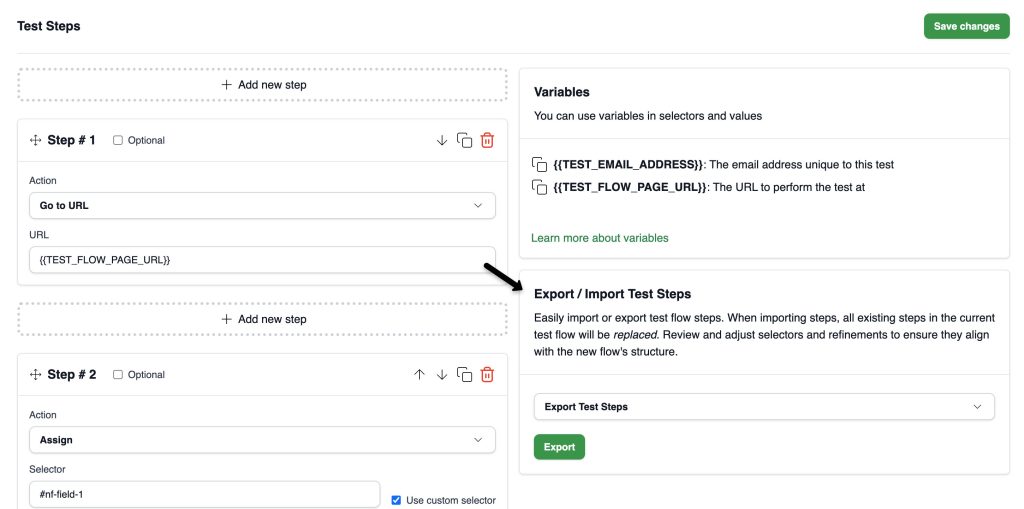
Import and Export Steps
To streamline test flow setup, CheckView now supports importing and exporting test steps using a standard JSON file format directly within the step editor. This feature is useful for backing up test flows, duplicating across environments, or sharing with teammates.
How to Export Test Steps
- Open the Step Editor: Navigate to the test suite you’d like to export and open the step editor.
- Access the Export/Import Panel: On the right-hand side of the step editor, locate the Export / Import Test Steps section.
- Select “Export Test Steps”: Ensure the Export Test Steps tab is selected, then click Export.
- Download the JSON File: A .json file will automatically download containing all current steps, selectors, and configurations from the test.
How to Import Test Steps
- Open the Step Editor: Navigate to the test suite where you want to import steps.
- Access the Export/Import Panel: On the right-hand side of the step editor, go to the Export / Import Test Steps section.
- Select “Import Test Steps”: Click the Import Test Steps tab to activate the import panel.
- Upload a JSON File: Choose the .json file containing your exported steps. After uploading, the steps will be automatically added to your current test suite. Note all existing steps in the step editor are replaced.
- Review & Save: Double-check the imported steps for accuracy. You can modify any selectors or step settings before saving your test.
Note: If you encounter issues importing steps from another test flow, first click “Save” on the original test flow before exporting. Then, use the newly exported file to import steps into the new test flow. This ensures all data is properly captured.