Whitelist CheckView’s IPs in WordFence
To ensure proper automated testing, CheckView requires whitelisting its IP addresses. By default, CheckView attempts to automatically add its IPs to the WordFence firewall options panel. However, if you experience issues such as forms not displaying or tests failing to run, you may need to manually whitelist our IPs as described below.
- Log into your WordPress admin dashboard (typically found at yourwebsite.com/wp-admin).
- In the left-hand menu, hover over Wordfence and click on Firewall.
- On the next screen, click on All Firewall Options (next to the gear icon).
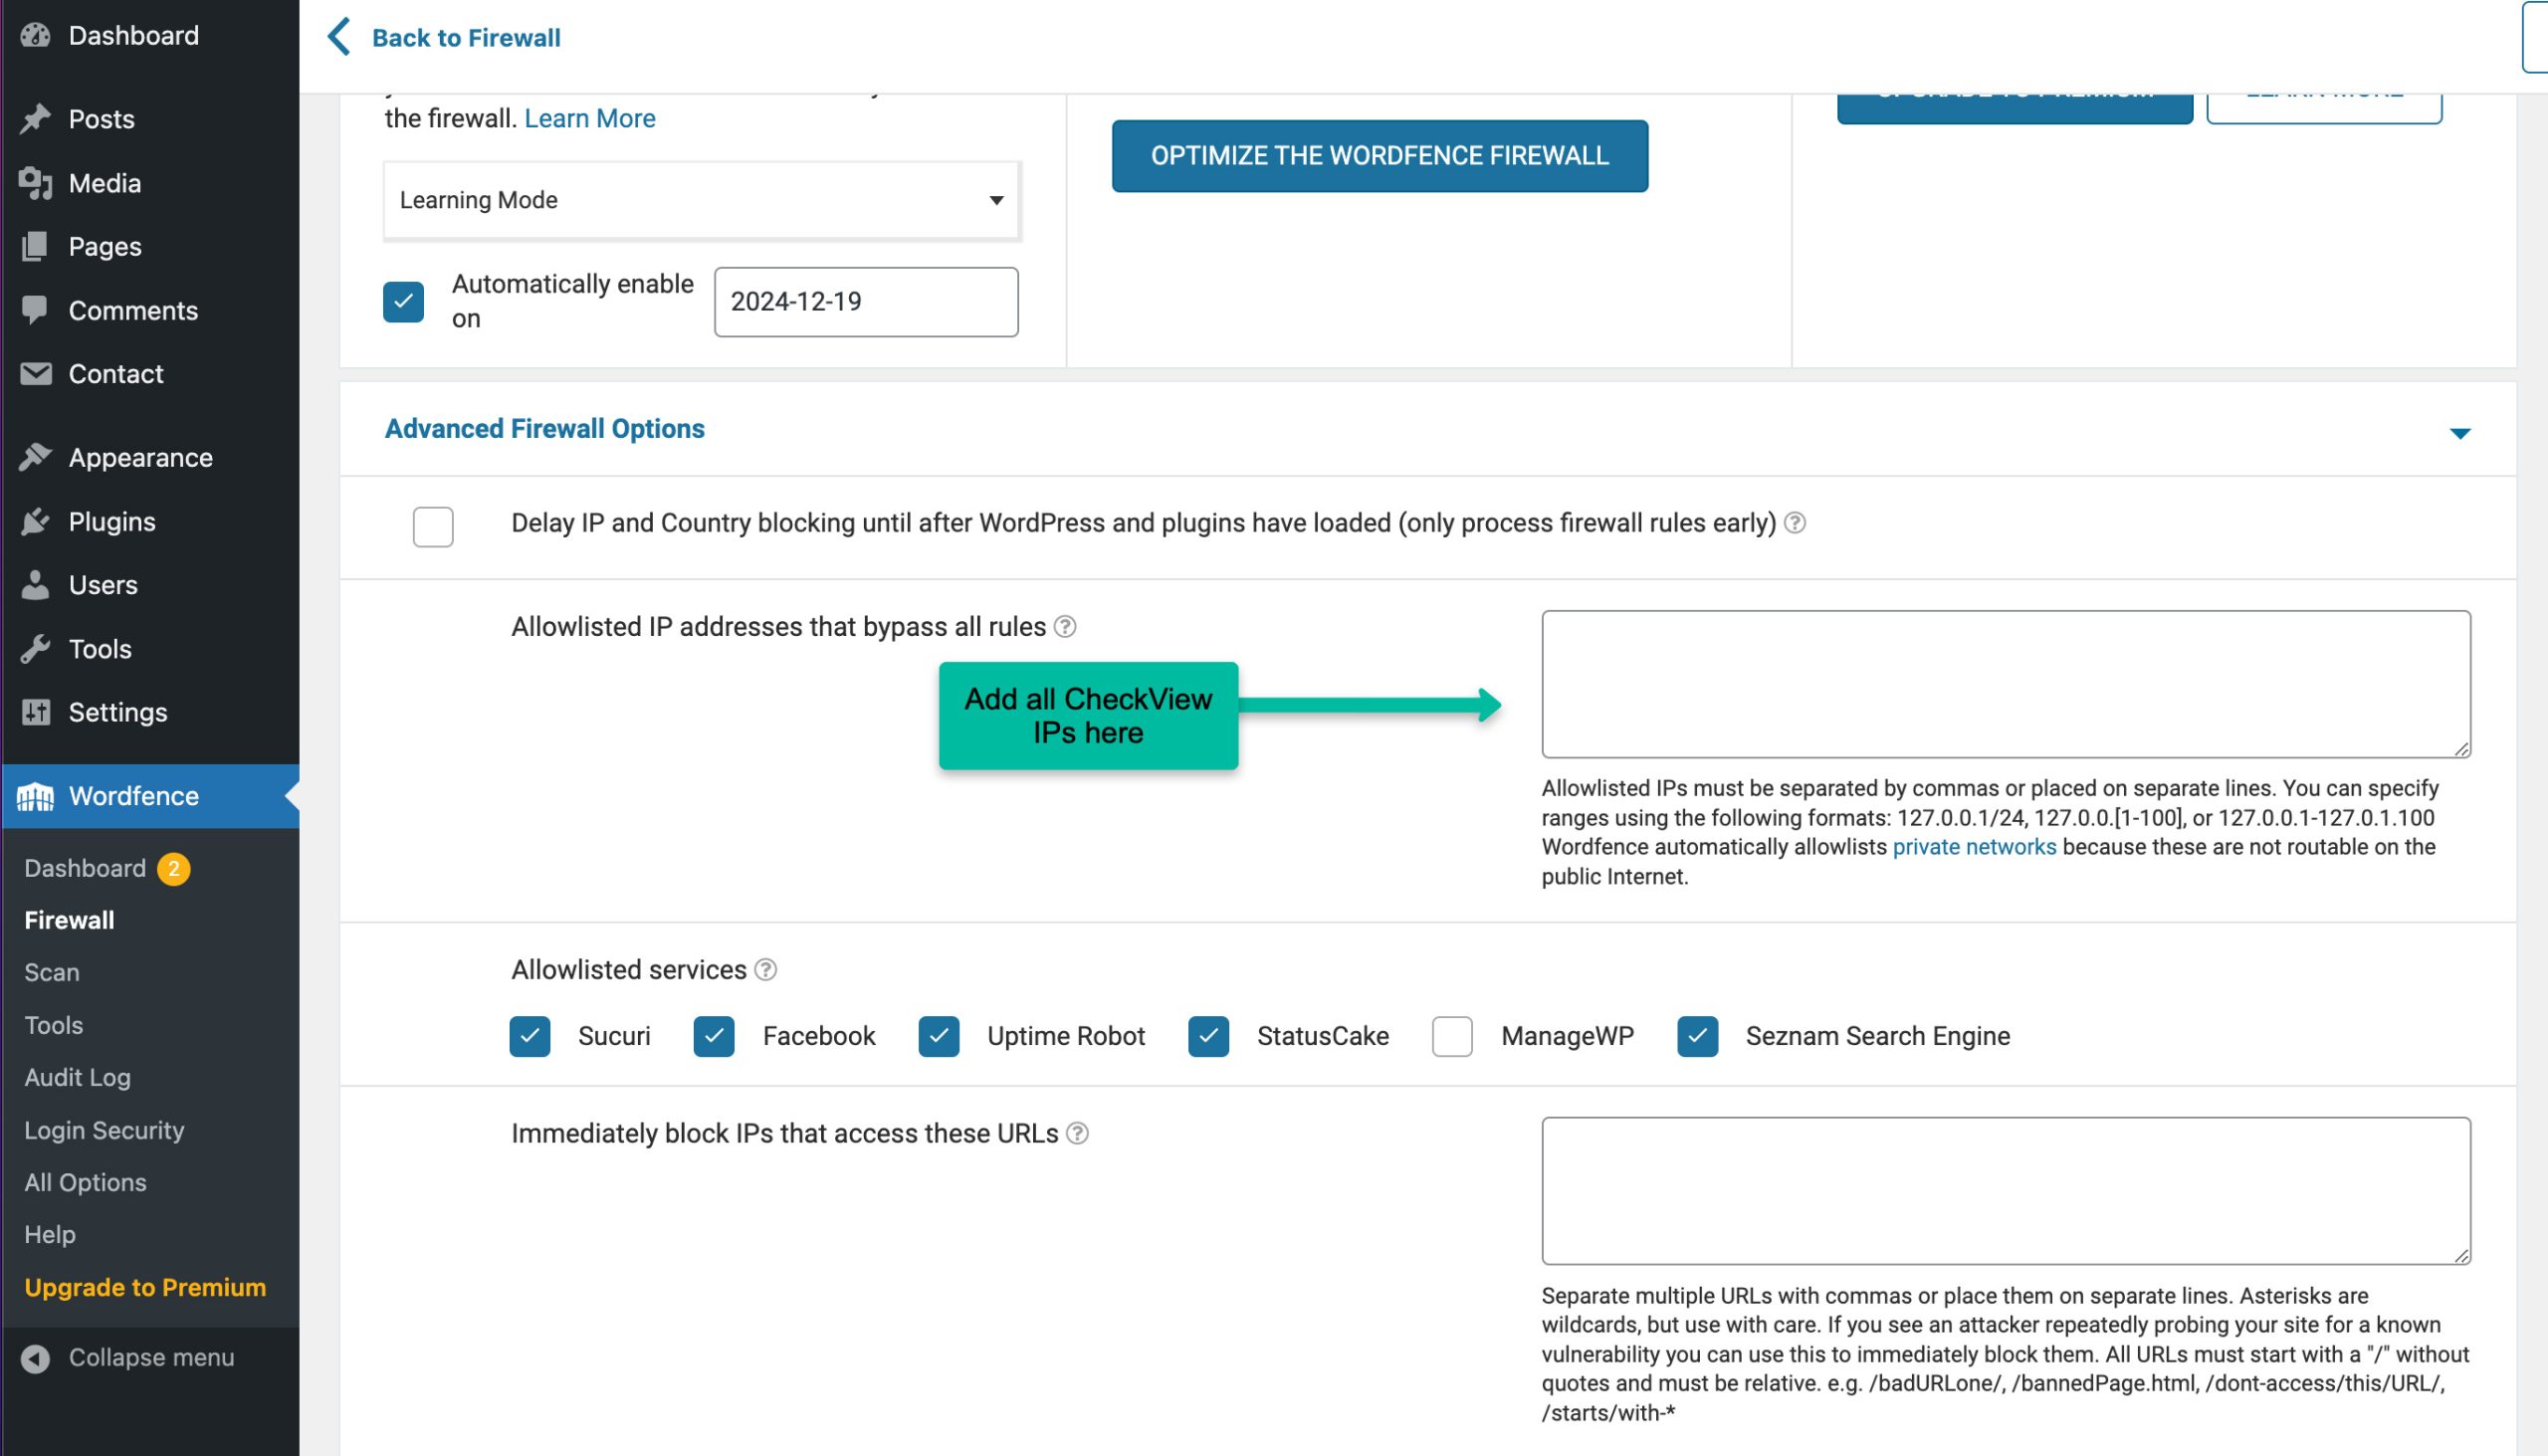
- At the top of the Firewall Options screen, locate the section labeled Whitelisted IP addresses that bypass all rules.
- In the box provided, add the CheckView IPs in this link, comma separated.
- Click Save Changes in the top-right corner to apply your updates.

Once saved, rerun your CheckView tests to confirm the allowlist settings are effective. If issues persist, double-check the IP entries or review WordFence logs for further troubleshooting.