
How to Whitelist CheckView IPs in Cloudflare
Cloudflare Custom Rule Setup (Recommended)
- Log in to Your Cloudflare Account: Start by logging into your Cloudflare account using your credentials.
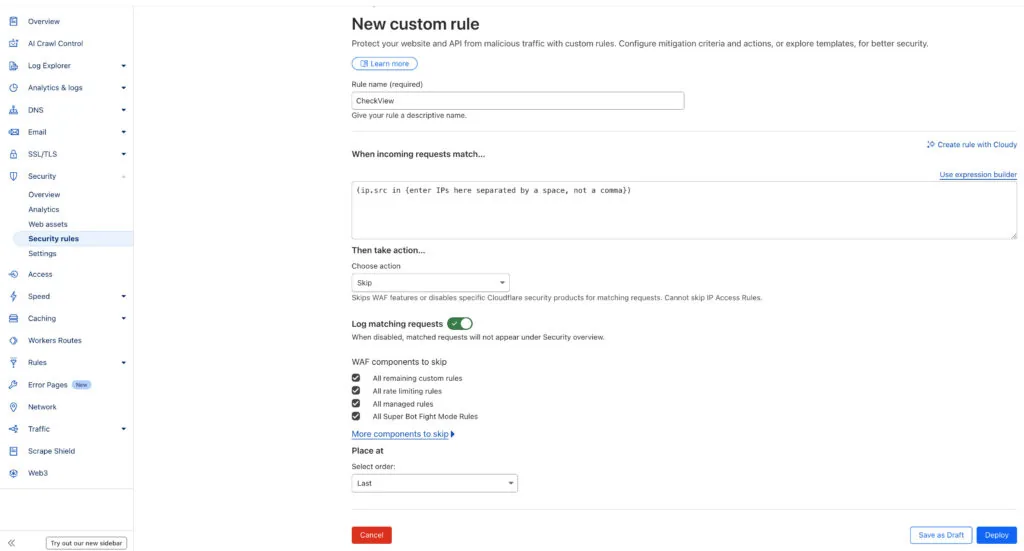
- Navigate to the Security Rules: Once logged in, go to Security > Security Rules.
- Create Rule: Click on Create rule and select custom rules
- Rule Name: Add a rule name such as ‘CheckView’
- Expression Builder: Click ‘Use expression builder‘
- Expression: In the “When incoming requests match…” field, enter (ip.src in {enter IPs here separated by a space, not a comma}). Paste in all of the IPs in this link inside the curly brackets and remove the commas, only leaving spaces.
- Set Action: Choose Action: “Skip”, and check all available WAF components to skip checkboxes such as All remaining custom rules, All rate limiting rules, All managed rules, All Super Bot Fight Mode Rules, etc.
- Place at Last
- Click ‘Deploy’
- Nice job! Your settings will now allow CheckView to operate without interference from Cloudflare.
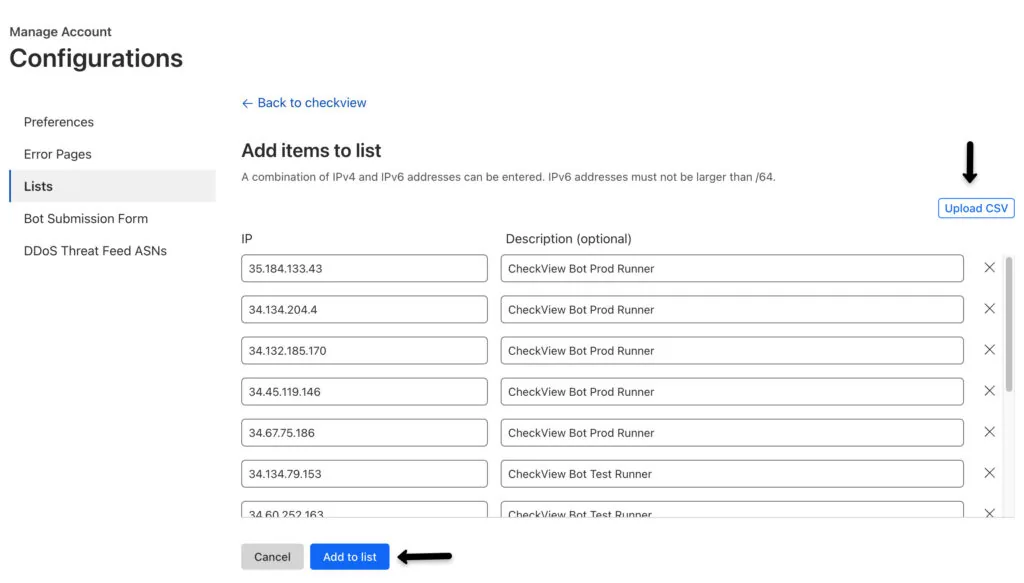
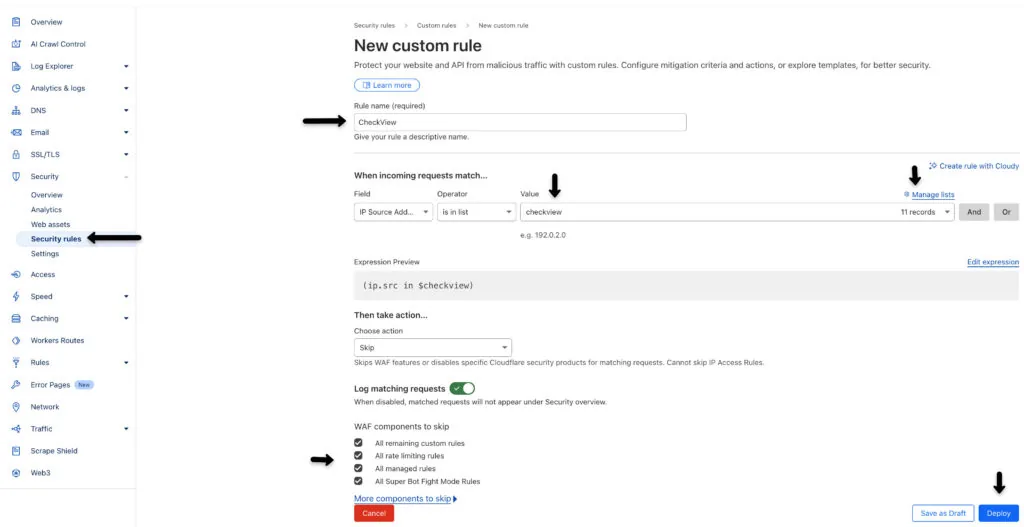
Alternatively, you can also use managed lists instead of the expression builder. You can bulk upload the IPs using this preformatted CSV and import into a managed list instead.
If you are on Cloudflare’s free plan
The steps above assume Pro or higher. On the free plan, the “All Super Bot Fight Mode Rules” checkbox does not exist, because Super Bot Fight Mode starts at Pro.
The free plan runs Bot Fight Mode instead, and it does not run on Cloudflare’s Ruleset Engine. That means a WAF custom rule using Skip, Bypass or Allow has no effect on it, no matter how the rule is written.
On the free plan, use an IP Access Rule instead:
- Go to Security → WAF → Tools (or Security → IP Access Rules).
- Add each CheckView IP in this link with the action set to Allow, scoped to the site.
Bot Fight Mode does not trigger on a request that matches an IP Access Rule, which is why this is the mechanism that works here.
One caveat: Cloudflare has signalled that IP Access Rules are being retired. It is the correct answer on the free plan today, but if a store is business-critical, Pro plus the Skip rule above is the durable setup.
Cloudflare IP Access Rules (Legacy)
Note this method is not recommended on Pro and above since only affects Cloudflare’s Access Rules layer (IP reputation blocking), but it does not automatically bypass WAF, Bot Fight Mode, Rate Limiting, or Turnstile challenges.
- Log in to Your Cloudflare Account: Start by logging into your Cloudflare account using your credentials.
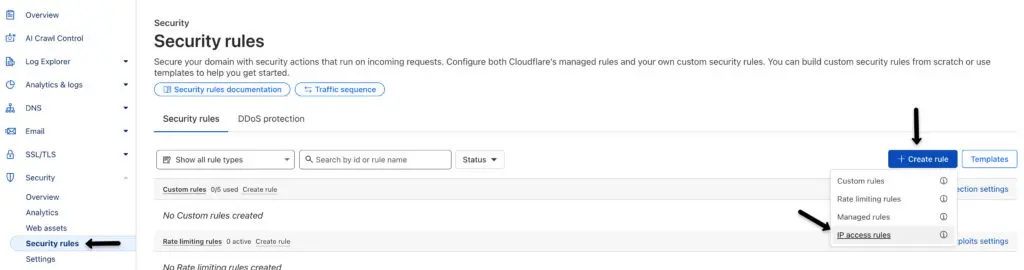
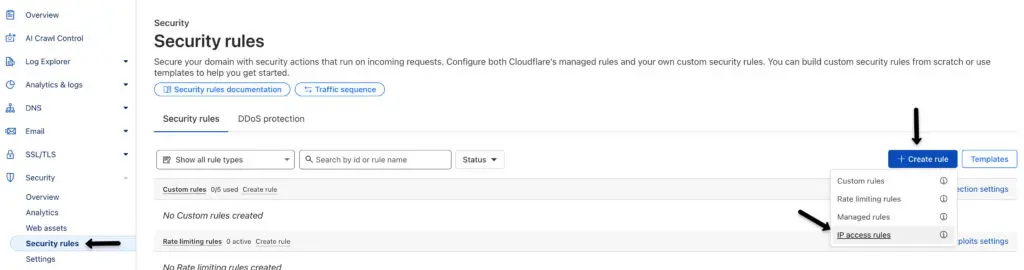
- Navigate to the Security Rules: Once logged in, go to Security > Security Rules.
- Create Rule: Click on Create rule and select IP access rules
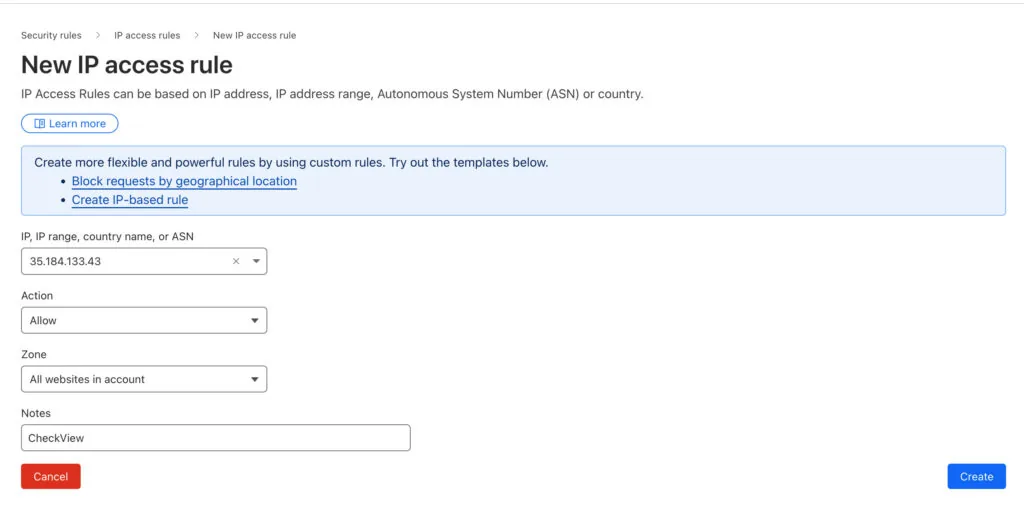
- Add IP Address Information: Under IP Access Rules, enter the following details:
- IP, IP range, country name, or ASN: Paste the first CheckView IP address in this link
- Action: Select Allow.
- Zone: Choose All Websites in Your Account.
- Notes (Optional): Add the word ‘CheckView’.
- Click Create
- Repeat this, creating an IP access rule for each IP in this link.
- Nice job! Your settings will now allow CheckView to operate without interference from Cloudflare (in most cases).
Related Articles
- Whitelisting CheckView IPs and Bypassing Security Plugin Blocks
- Blocker Detection – CheckView now auto-detects when this service blocks tests
Once CheckView can reach your site, everything in the feature set runs against it on your schedule.