
How to Automatically Test Elementor Pro Forms
Elementor Pro’s Form widget is one of the better form builders in WordPress and a big part of why is that it lives where you are already working. You lay a form out visually alongside the rest of the page and conditional logic, multi-step flows, file uploads, native CAPTCHA options and a long list of submit actions are all there without a second plugin or a second interface to learn. That is very convenient.
There is one caveat, and it is usually nothing to do with Elementor. Your form is the front end of a longer chain. It collects the entry, then hands it to your mail provider, your DNS records, your CRM or marketing platform and whatever spam protection sits in front of all of it. Each of those is a separate service with its own settings, its own credentials, and its own ways of changing without telling you. The form widget can be working exactly as designed while something further down that chain quietly stops doing its job.
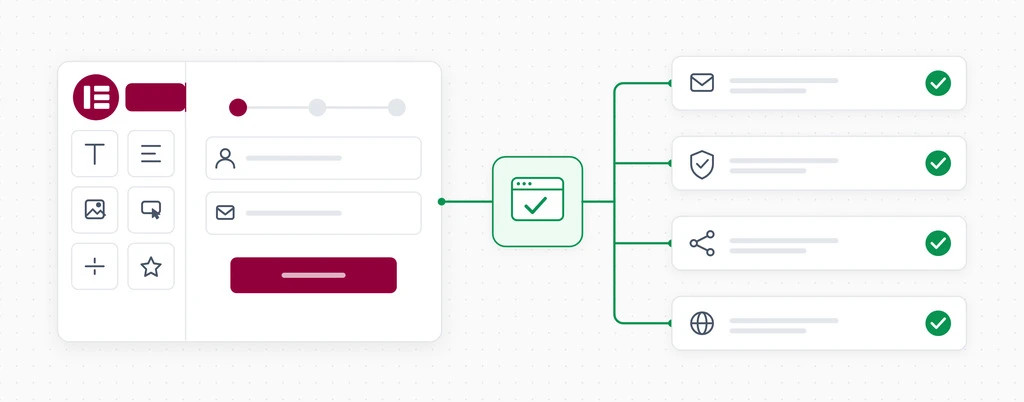
That is where automated testing can help. Instead of checking that your page loads, CheckView fills in your Elementor form, submits it, and confirms the entry actually made it through on whatever schedule you choose.
We are excited to announce CheckView now supports Elementor Pro form testing. We built it with help from the Elementor team, who added the developer hooks that make safe, non-destructive testing possible on a live site. This release covers Elementor Pro’s classic (V3) Form widget.
What a scheduled form test actually verifies
Whichever builder made the form, these are the things that actually interrupt delivery, and all of them sit outside it:
Email delivery: An SMTP plugin’s API key is rotated, a sending domain’s SPF or DKIM record is edited during unrelated DNS work or a transactional provider starts filtering to spam. The form submits perfectly. The notification never lands in the inbox.
CAPTCHA and anti-spam configuration: reCAPTCHA site keys get regenerated, a domain is added to a Google account without the old one being carried over or a newly installed security plugin starts scoring legitimate submissions as bot traffic.
Changes elsewhere on the site: A theme update, a new plugin, or an optimization layer combining JavaScript differently. These rarely have anything to do with your form and occasionally affect it anyway.
A scheduled test exercises the whole path end to end and tells you the same day if any link in it changes.
What CheckView does on an Elementor test
Point CheckView at an Elementor form and it handles the setup for you:
- Automatic test generation: CheckView detects your Elementor forms and builds the test steps. There is typically no manual step configuration.
- Real submissions, no real emails: Notification emails are redirected to the CheckView test inbox for the duration of the run and CC and BCC recipients are stripped. Your team and your clients never receive test submissions.
- CAPTCHA handled cleanly: Elementor Pro’s built-in reCAPTCHA v2, reCAPTCHA v3 and Honeypot fields are skipped for the CheckView test session only. Your protection stays fully active for every real visitor. CheckView also handles the separate plugins that add hCaptcha, Cloudflare Turnstile, Akismet, CleanTalk and WP Armour.
- Integrations paused during tests: With Disable Form Integrations During Tests turned on, CheckView limits the form’s submit actions to email and save-to-database so CRM feeds, webhooks and marketing integrations do not fire for test entries.
- Verified, then cleaned up: The submission is checked field by field against the values the test entered, then removed from Elementor’s submissions tables so your real entries stay clean.
- The trickier field types: File uploads are matched to each field’s accepted file types. Date and time fields work in both flatpickr and native HTML5 modes. Multi-step forms are navigated automatically, including forms with custom Next and Previous button labels.
Setting it up
Elementor works the same way as every other supported form plugin in CheckView.
- Install and activate the CheckView helper plugin on your site, version 2.3.0 or newer. Elementor support arrived in 2.3.0.
- In your CheckView dashboard, open the website and click Add Test Flow.
- Choose Elementor, then pick the form and the URL it appears on.
- Set a schedule. Daily is the common choice for a primary contact or quote form.
CheckView builds the steps and runs an initial test straight away to confirm the flow works end to end so you know the form is being monitored properly from the moment you set it up. Any time you want to see a run for yourself, trigger one manually and CheckView records the full submission for you to watch back.
Classic and V4 Atomic forms
This release supports Elementor Pro’s classic (V3) Form widget which is the form most existing Elementor Pro sites are built on.
Elementor V4 introduced a rebuilt Atomic form element that uses a different rendering path and its own set of developer hooks. CheckView does not yet generate tests for it automatically. If you are already building with V4 Atomic forms, you can still monitor them using a custom test flow, though the Elementor-specific handling described above will not apply.
Working with the Elementor team
This integration exists because Elementor’s team was willing to build for it. Testing a form on a production site safely means suppressing notifications, skipping CAPTCHA for a single verified session and cleaning up the entry afterwards, and none of that is possible from the outside. Elementor added the developer hooks CheckView needed to do it without changing how the form behaves for a real visitor.
That is a meaningful thing for a plugin vendor to invest in and it is the reason Elementor Pro form testing works as cleanly as it does. Happy Testing!